
Your First Image: From Server to Endpoint
This guide covers the complete Day 2 workflow: you've already installed Prisma and it's running. Now let's capture your first corporate image and deploy it to a real machine.
TIP
Estimated time: 30-60 minutes for the full cycle (depends on image size and network bandwidth).
Step 1: Connect Your Storage (Storage Hub)
Before capturing images, you need a place to store them. Prisma supports NAS devices via NFS or SMB/CIFS.
Go to Settings → Storage and add your first Pool:
| Field | Example Value |
|---|---|
| Protocol | NFS |
| NAS IP | 192.168.1.10 |
| Export Path | /volume1/images |
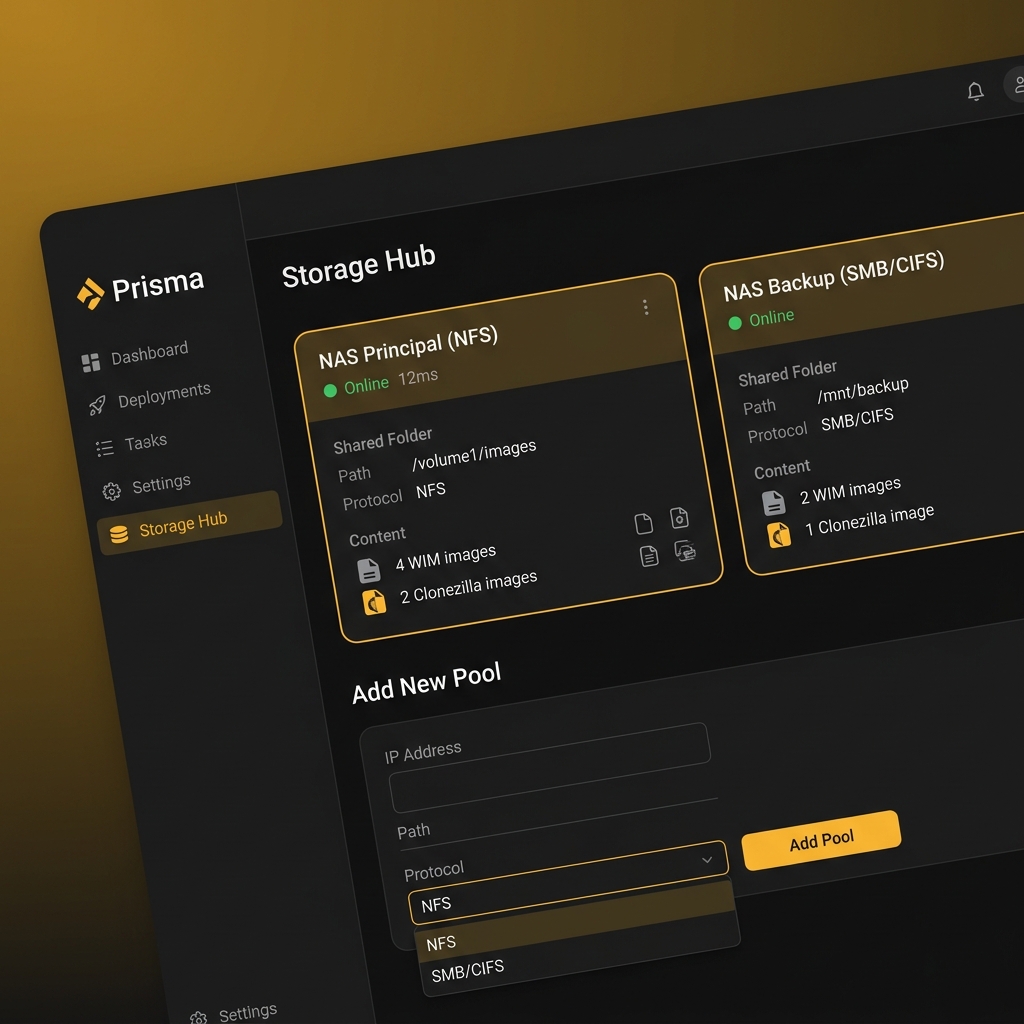
Once saved, Prisma will perform an automatic health-check. You'll see the "🟢 Online" status with real-time access latency.
IMPORTANT
If your NAS uses SMB/CIFS, make sure cifs-utils is installed on the server and the credentials have Read and Write permissions on the share.
Step 2: Prepare the Master Machine (Golden Image)
The master machine is the computer with the perfect corporate configuration you want to replicate. It should have:
- [x] Windows 10/11 installed and activated.
- [x] Chipset, network and graphics drivers installed.
- [x] Corporate software installed (Office, Antivirus, etc.).
- [x] Sysprep run or disabled depending on your cloning preference.
NOTE
For Clonezilla images (bit-for-bit), Sysprep is not required. For WIM + ppkg (lite deployment) images, it is recommended to avoid SID conflicts.
Step 3: Boot the Master Machine via PXE
- Connect the master machine to the network cable on the same VLAN as the Prisma server.
- Press your BIOS network boot key (F12, F11, F9 — varies by manufacturer).
- The system will boot into the Clonezilla Live or Windows PE environment served by Prisma.
- Select the "Capture Image" option from the menu.
┌─────────────────────────────────────────┐
│           ⛏ PRISMA BOOT MENU           │
│                                         │
│  1. Deploy Image                        │
│  ▶ 2. Capture Image (Golden Master)    │
│  3. Local Boot (No PXE)                 │
│  4. Diagnostic Tools                    │
│                                         │
└─────────────────────────────────────────┘
Step 4: Capture and Upload to Storage Hub
Once in the capture environment:
- The wizard will automatically detect available Storage Pools.
- Select the NAS you configured in Step 1.
- Give the image a descriptive name:
WIN11-CORP-2026-04is a good format. - Start the capture. Progress will be shown in real time.
TIP
Clonezilla is faster for large disks but creates full-size images. WIM is more efficient because it only captures used data and supports incremental updates.
Step 5: Verify the Image in the Inventory
Once capture is complete, go to the Prisma dashboard → Image Inventory:
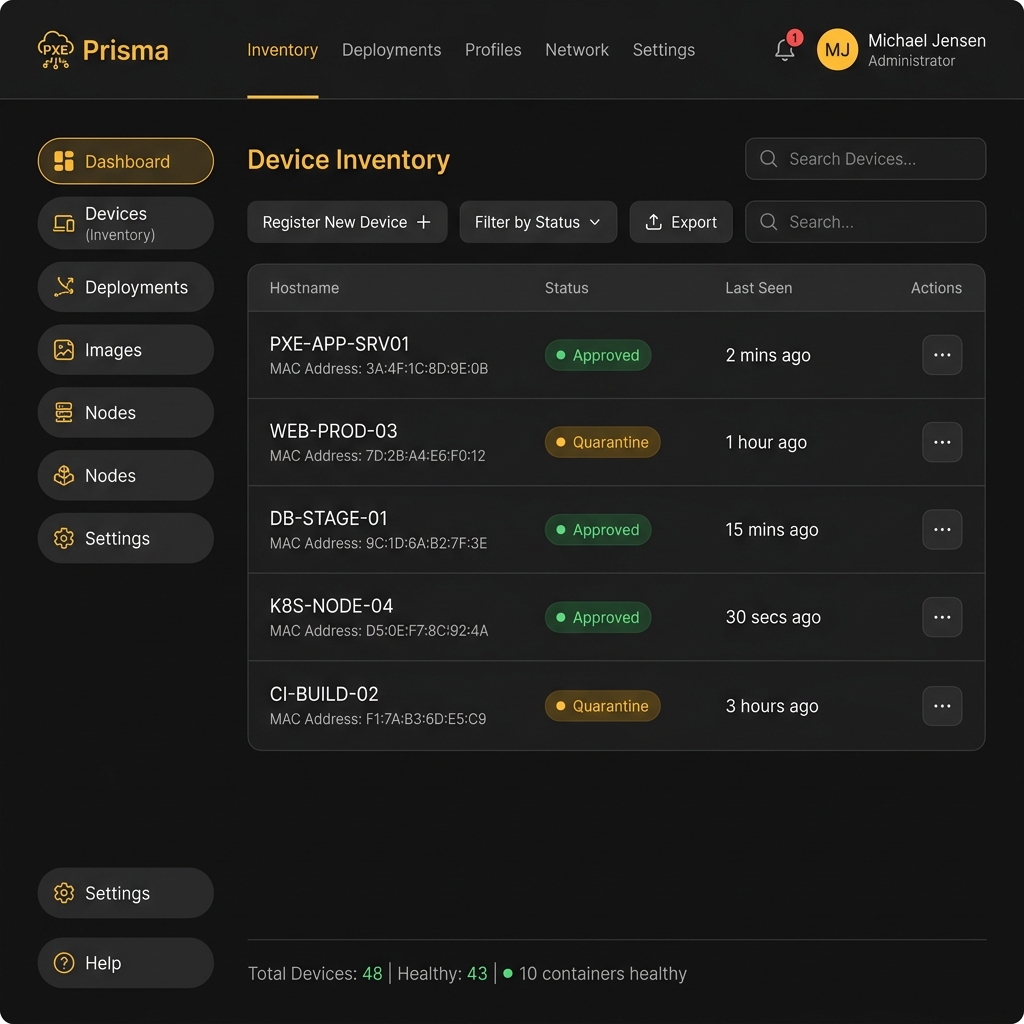
You should see your new image listed with:
- Name:
WIN11-CORP-2026-04 - Type:
ClonezillaorWIM - Size: The compressed image size.
- Status:
✅ Verified
Step 6: Deploy to a Real Machine
The moment of truth! Connect the target machine to the network and boot it via PXE:
- The machine will appear in Quarantine (isolated network IP) in the Inventory panel.
- A technician approves the machine from the console:
Pending → Approved. - Select the
WIN11-CORP-2026-04image and click "Deploy". - The machine will boot into the restoration environment and receive the image automatically.
Post-Deployment Checklist
Once the machine reboots, verify:
- [ ] The system boots correctly into Windows.
- [ ] The machine appears as "Active" in the Prisma inventory.
- [ ] The MDM Agent is installed and connected (status "🟢 Online").
- [ ] Corporate software is accessible and working.
- [ ] The machine is reachable via Remote Support from the console.
Having issues? Check the Troubleshooting section in the User Manual or ask the AI Assistant in the bottom-right corner.
Prisma v1.16.0 Surgery — Coblyn Engine · GKSistemas